As I prepare to release my first NuGet package, I figured I would provide a walkthrough of how I set all this up. While I’ve used NuGet before (and even set up a private feed for internal libraries at my day job using ProGet, which is awesome), I’ve never published a public package to NuGet.org. While there is ample help available, it can be a little confusing how to rig everything up. I also wanted to enable continuous integration so that every time I committed a change to my library, it would automatically push a new NuGet package.
The only assumption before we start this walkthrough is that you’ve got a class library that would be suitable for a standard NuGet package. That is, you don’t use any kind of exotic external libraries or require special packaging. I’m not going to discuss more advanced NuGet packages, but there should be ample resources available on the NuGet site to help you adapt this walkthrough if needed.
Create a GitHub Account and Repository
Most of you will already have an account on GitHub, and you may already have a repository for your library. If you don’t have a GitHub account, go ahead and create one. You’ll also need to make a repository for your library by clicking on the “Repositories” tab and then clicking “New”.

Pushing your code to the repository and general Git usage is mostly outside the scope of this walkthrough. However, see the GitHub help pages if you need some guidance. You don’t necessarily need to do your first push yet, but you will need to push everything a little later.
Create a NuGet Account
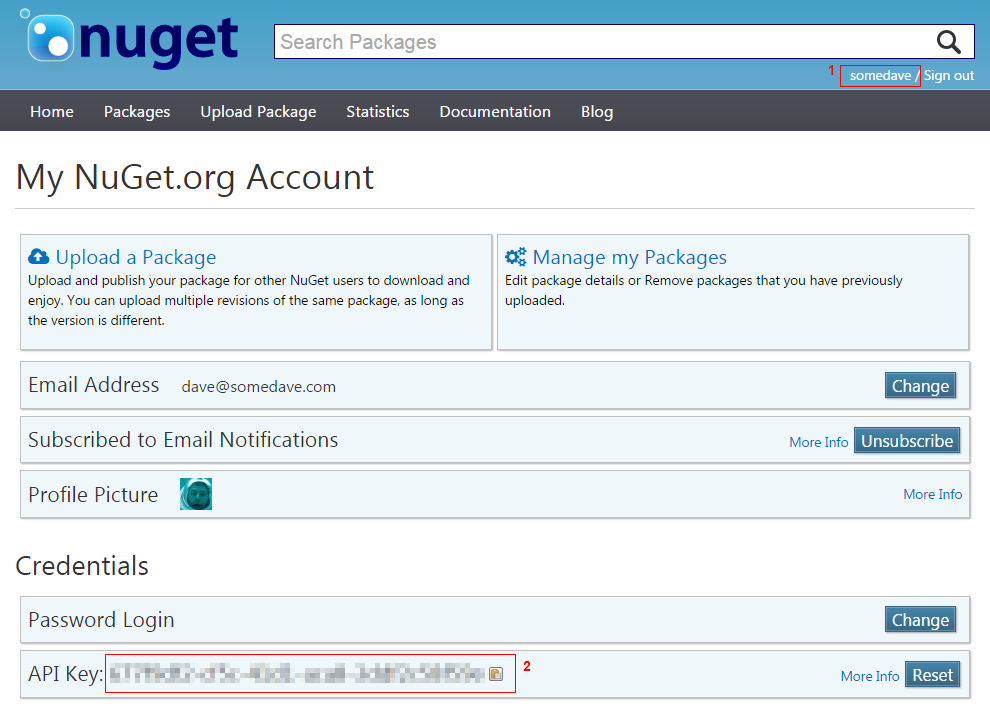
If you don’t already have one, go ahead and create a new NuGet.org account as well. Once you've created an account, you need to get your API key which can be found on your account page.
Create an AppVeyor Account and Project
While we’re creating accounts, let’s also create an AppVeyor account. It’s free for unlimited public repositories, so there’s really nothing to loose. I created an account directly on AppVeyor, but you can also choose to login using your GitHub credentials.
Once you’re logged in, click on the “Projects” tab and then click “New Project”. This will allow you to link up your GitHub account (or BitBucket, Kiln, etc.) and select the repository that you want to use. Go ahead and select the repository that we created in the first step.
Set Up the NuGet Package
Now we need to go back to our local system and prepare the NuGet package. NuGet works in two phases. The first step is to create a .nuspec file that contains all of the metadata for your package. Then, each time that you change the library, the .nuspec file gets reused to create the actual NuGet package that can be deployed to users. To create the .nuspec file, open a command prompt with nuget.exe in the path and run nuget spec from the same folder as your project. This will create the .nuspec file and give it the same name as your project file.
Open the .nuspec file in a text editor. It should look like this:
<?xml version="1.0"?>
<package >
  <metadata>
    <id>$id$</id>
    <version>$version$</version>
    <title>$title$</title>
    <authors>$author$</authors>
    <owners>$author$</owners>
    <licenseUrl>http://LICENSE_URL_HERE_OR_DELETE_THIS_LINE</licenseUrl>
    <projectUrl>http://PROJECT_URL_HERE_OR_DELETE_THIS_LINE</projectUrl>
    <iconUrl>http://ICON_URL_HERE_OR_DELETE_THIS_LINE</iconUrl>
    <requireLicenseAcceptance>false</requireLicenseAcceptance>
    <description>$description$</description>
    <releaseNotes>Summary of changes made in this release of the package.</releaseNotes>
    <copyright>Copyright 2014</copyright>
    <tags>Tag1 Tag2</tags>
  </metadata>
</package>
Go ahead and add content for all of the elements except version, which should be left as $version$. This takes care of your package specification. Now we need to figure out how to build the actual NuGet package.
In the past I’ve always created NuGet packages from a project by running nuget pack MyProject.csproj after any changes. However, this process isn’t ideal for a continuous integration environment where the NuGet package file needs to be built by the continuous integration server. Jim Counts has written some very good instructions on how to add package building to your msbuild process. I initially thought I’d need to do this too, but it turns out that AppVeyor has built-in support for NuGet so you don’t have to worry about messing with your build files (though there may be other reasons why you’d want to do this, such as if you want to also create NuGet packages locally during build).
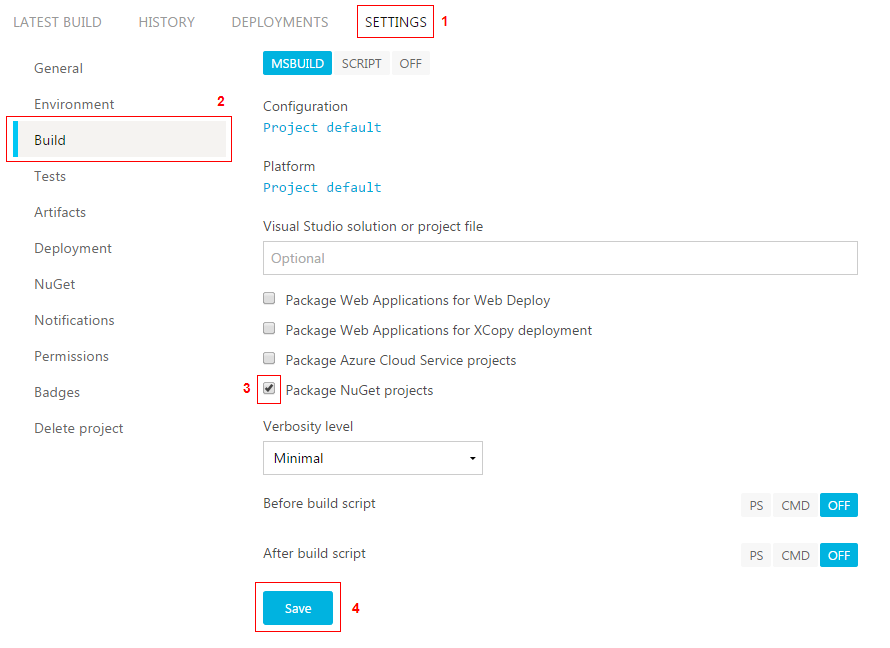
To turn this feature on, open up your AppVeyor project and click “Settings”. Then select “Build” and check “Package NuGet projects”. When it is enabled AppVeyor calls nuget pack for every project in the solution that has a .nuspec file in its root and then publishes NuGet package artifacts in both project and account feeds.
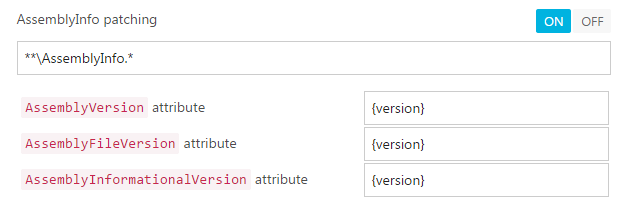
You'll probably also want to turn on AssemblyInfo patching. This will enable AppVeyor to modify your AssemblyInfo.cs file with an updated version number on each build. Since we told NuGet to use the version number from the assembly as well, this will also automatically update your NuGet package version. To turn on AssemblyInfo patching, go to "Settings" then "General" and the option is near the bottom of the page.
Push Your Code to GitHub and Trigger a Build
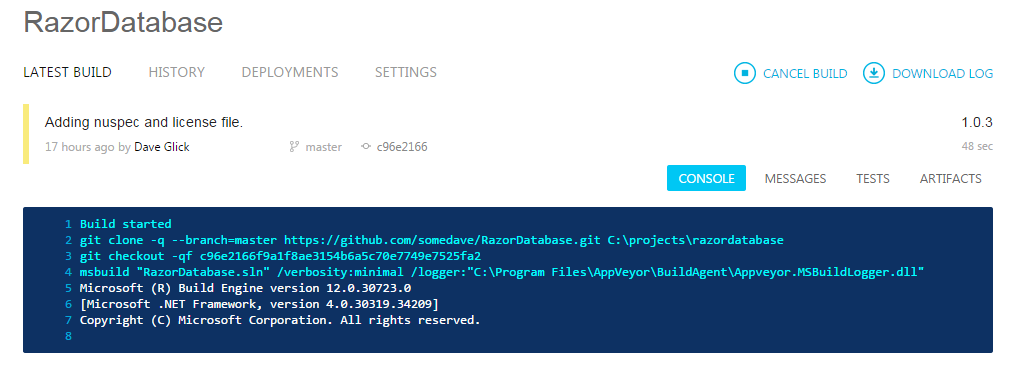
If you haven't yet pushed your code to your GitHub repository, go ahead and do that now. When you commit code to the repository, AppVeyor will automatically kick-off a build. If you already had code in your repository, you can manually trigger a build from the AppVeyor "Latest Build" project page. In both cases, the build will be queued by AppVeyor and may take a minute or two to kick off. Once it does, you'll get an automatically updated console window with the build results on the "Latest Build" page in AppVeyor.
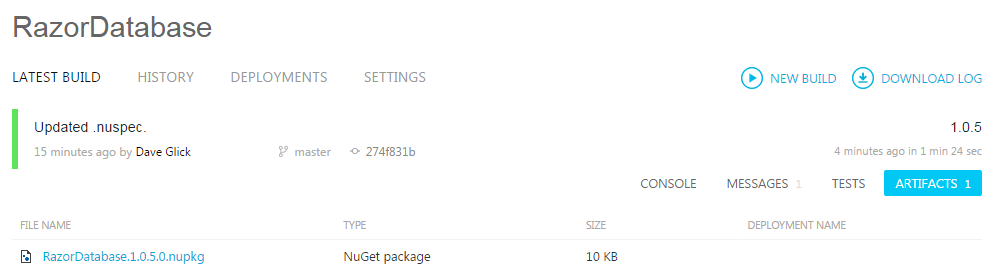
Once the build is done, you should be able to see your NuGet package in the "Artifacts" tab.
Deploying Your NuGet Package
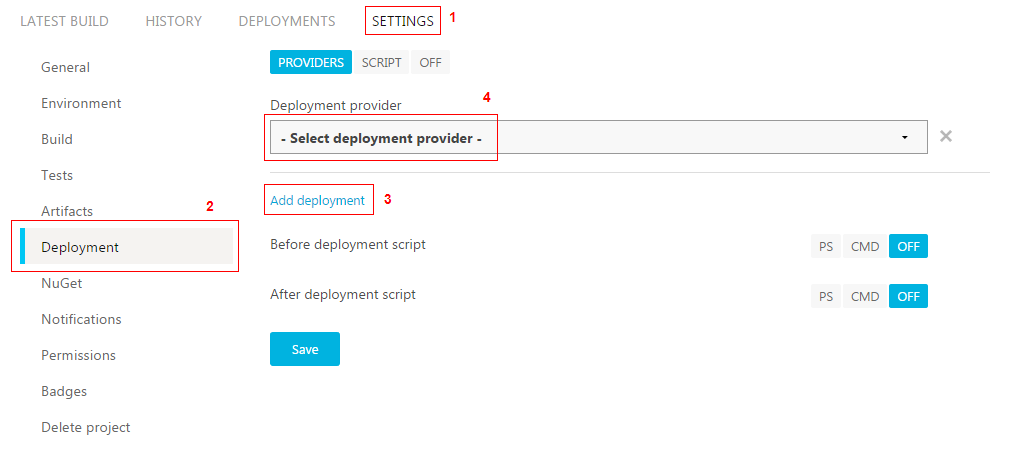
The last step is to deploy your NuGet package. This can be set up automatically using AppVeyor, just click "Settings", "Deployment", and then "Add deployment". Select ""NuGet" from the list and add your API key we fetched when setting up your NuGet.org account (you can leave the "NuGet server" and "Artifact(s)" fields empty). This will automatically push your NuGet package to NuGet.org on your next build.
A Final Word, And More Control
That's all it takes for a simple setup. Alternatively, AppVeyor also allows you to place a special file in your repository that it will use to configure everything. This gives you a little more control and also helps correlate your build with a specific revision in the repository. Stuart Wheelwright has written a great tutorial on this approach.