It's been a little while since I've done a todo post for Wyam, so I figured it was about time. In this post I'll show you how to make a nice one-page GitHub profile site. We'll use the GitHub module to fetch data from GitHub about your account and then render it using a Razor view. The whole thing is about 50 lines of code between the Wyam config file and the minimum Razor template (not counting a pretty style, which we'll add at the end).
Config File
Given how powerful they are, most people these days are using Wyam recipes to create their sites. These are essentially pre-canned configurations for specific use cases like documentation or blogs. However, using a recipe certainly isn't required and may be overkill if you just want to create a simple static site.
For this site we're going to get some data from GitHub using the GitHub module. This module is a thin wrapper around Octokit so we have access to everything we would when using Octokit directly. The module just makes it easier to add Octokit data to a Wyam document.
The start, we need to add the Wyam.GitHub package and the Wyam.Razor package to the configuration file since those libraries contain the GitHub module and the Razor module respectively. Create a file in an empty directory called config.wyam and add this to the top of it:
#n Wyam.Razor
#n Wyam.GitHub
Now we're going to add a pipeline that reads a Razor template, fetches data from GitHub and adds it to the model for the Razor template, and renders the template to an HTML file. Behind the scenes, Wyam uses a concept called documents to store content and metadata. What we're really doing here is creating a new document that contains our Razor template, adding metadata that stores our GitHub objects in the document, and then rendering the content of the document as a Razor template. The Razor module knows to take any metadata for the document that's being rendered and present it as if it were the model for the Razor page.
// Let's store the username, change this to whatever you want
string username = "daveaglick";
Pipelines.Add(
    // Read the template
    ReadFiles("index.cshtml"),
    // Add GitHub data to the template
    GitHub()
        .WithRequest("User", x => x.User.Get(username).Result)
        .WithRequest("Repos", x => x.Repository.GetAllForUser(username).Result),
    // Render the template
    Razor(),
    // Write it out
    WriteFiles(".html")
);
Note that in the GitHub module we're using the fluent method WithRequest to create requests to the GitHub API. The first argument of that method indicates the key of the metadata object we wish to store the result in. The second argument is a delegate that passes a Octokit GitHubClient instance and stores the return value in the metadata of the document. You can specify as many of these requests as you like. Also note that I'm using the pattern of storing the entire Octokit result object in the metadata (which will then be passed to the Razor page as it's model). An alternate pattern would be to store an intermediate object with only the data you need or to store just the values you need such as a user name.
That's it for the config file (for now).
Razor Page
Now we have to use the data we fetched from the GitHub module inside a page. Create a file named index.cshtml inside a folder named input (input is where Wyam looks for input files). Here's what the index.cshtml file should contain:
@using Octokit;
@{
    User user = Model.Get<User>("User");
    IReadOnlyList<Repository> repos = Model.Get<IReadOnlyList<Repository>>("Repos");
}
<html>
    <head>
        <title>@user.Name</title>
    </head>
    <body>
        <img src="@user.AvatarUrl">
        <h1>@user.Name</h1>
        <h2>@@@user.Login</h2>
        <p><a href="@user.HtmlUrl">Link</a></p>
        <p>@user.Bio</p>
        <p>Created at @user.CreatedAt.ToString("MM/dd/yyyy h:mm tt")</p>
        <hr />
        <h2>Repositories</h2>
        @foreach(Repository repo in repos.Where(x => !x.Fork).OrderByDescending(x => x.StargazersCount))
        {
            <h3>@repo.Name</h3>
            <p>@repo.StargazersCount stars, @repo.ForksCount forks</p>
            <p><a href="@repo.HtmlUrl">Link</a></p>
            @if(repo.Homepage != null)
            {
                <p><a href="@repo.Homepage">Homepage</a></p>
            }
            <p>@repo.Description</p>
            <p>Created at @repo.CreatedAt.ToString("MM/dd/yyyy h:mm tt")</p>
        }
    </body>
</html>
This is mostly just standard Razor syntax, but let's break it down a bit. At the top of the file we're including the Octokit namespace. Wyam will automatically reference all assemblies you include in your configuration file, including their dependencies. Since Octokit is a dependency of Wyam.GitHub, that assembly is loaded and available. We still have to tell the Razor page to bring the Octokit namespace into scope though.
Next we're pulling the Octokit objects we stored in metadata and which were made available as the Razor page's model into local variable to make using them a little easier. This part is optional, but writing @user.Name is preferable to @Model.Get<User>("User").Name if we're going to be accessing those model properties a lot.
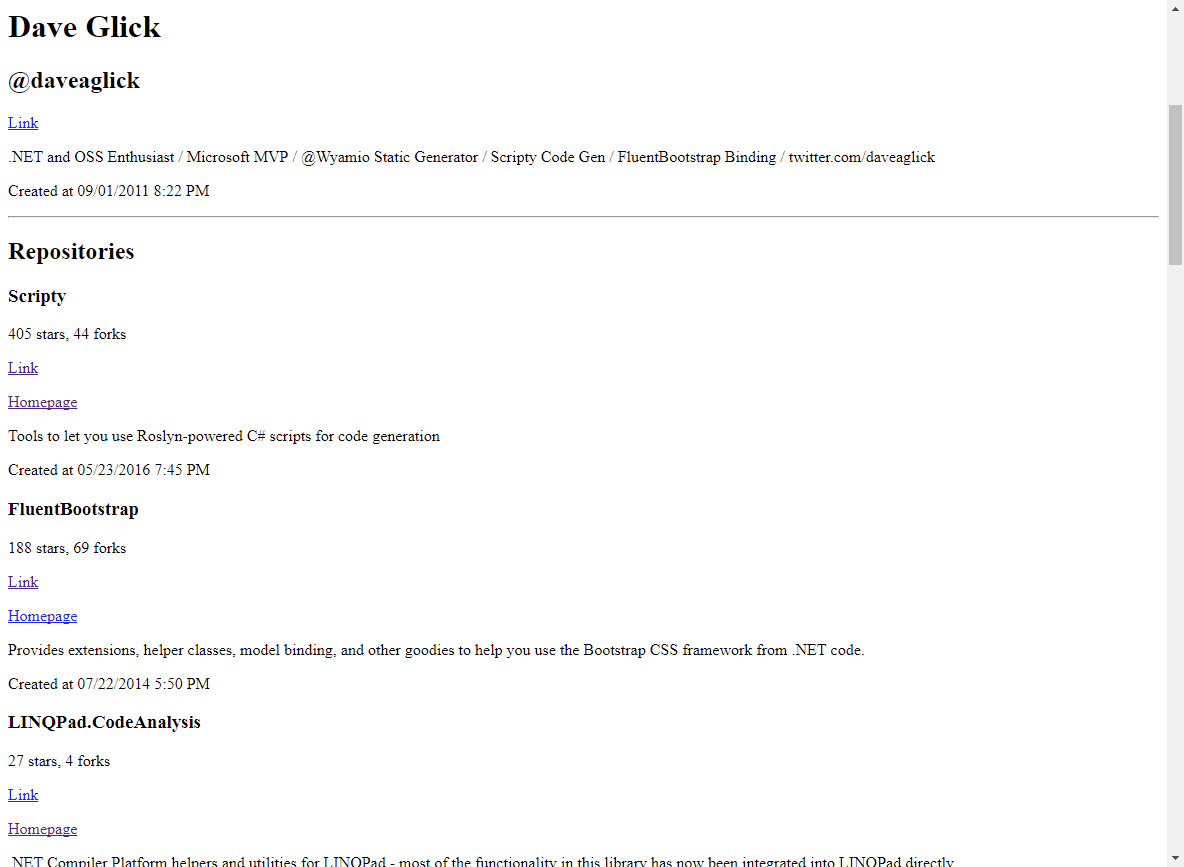
The rest of the page is bare-minimum Razor and HTML to display information about the requested GitHub user.
If you don't already have Wyam, go download it and then run wyam -p from the directory where your config.wyam file is located. Once the build is done, you should be able to preview the site at http://localhost:5080/:
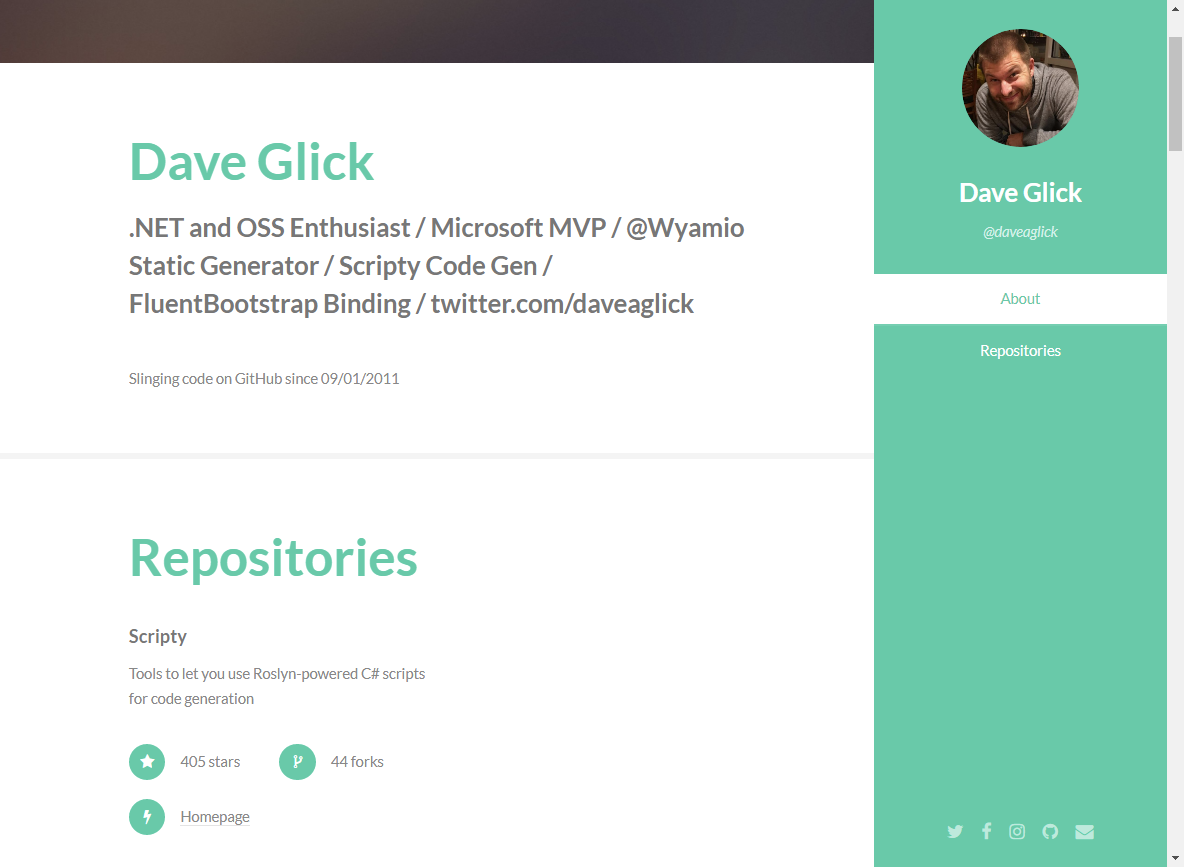
Making It Pretty
It works, but it's ugly. Let's go to my favorite site for web templates, HTML5 UP!. I think Read Only will work well so let's use that one. Download and unzip the theme into a temporary location and then copy everything but the index.html file to the input directory we created earlier (you should end up with an assets and an images folder inside your input folder).
First we need to add one more pipeline to our config.wyam file to copy these extra theme files to your output directory using the CopyFiles module. Place this under your existing pipeline:
Pipelines.Add(
    // Copy all resources to the output folder
    CopyFiles("**/*{!.cshtml,.*}")
);
Now we need to take the code that's already in our index.cshtml file and insert it into the right places in the theme's index.html file. I'll spare you the details since this really has nothing to do with Wyam directly. The end result is the code below, copy over the content in your index.cshtml file with this:
@using Octokit;
@{
User user = Model.Get<User>("User");
IReadOnlyList<Repository> repos = Model.Get<IReadOnlyList<Repository>>("Repos");
}
<!DOCTYPE HTML>
<!--
Read Only by HTML5 UP
html5up.net | ajlkn
Free for personal and commercial use under the CCA 3.0 license (html5up.net/license)
-->
<html>
<head>
<title>@user.Name</title>
<meta charset="utf-8" />
<meta name="viewport" content="width=device-width, initial-scale=1" />
<!--[if lte IE 8]><script src="assets/js/ie/html5shiv.js"></script><![endif]-->
<link rel="stylesheet" href="assets/css/main.css" />
<!--[if lte IE 8]><link rel="stylesheet" href="assets/css/ie8.css" /><![endif]-->
</head>
<body>
<section id="header">
<header>
<span class="image avatar"><img src="@user.AvatarUrl" alt="" /></span>
<h1 id="logo"><a href="@user.HtmlUrl">@user.Name</a></h1>
<p>@@@user.Login</p>
</header>
<nav id="nav">
<ul>
<li><a href="#one" class="active">About</a></li>
<li><a href="#two">Repositories</a></li>
</ul>
</nav>
<footer>
<ul class="icons">
<li><a href="#" class="icon fa-twitter"><span class="label">Twitter</span></a></li>
<li><a href="#" class="icon fa-facebook"><span class="label">Facebook</span></a></li>
<li><a href="#" class="icon fa-instagram"><span class="label">Instagram</span></a></li>
<li><a href="#" class="icon fa-github"><span class="label">Github</span></a></li>
<li><a href="#" class="icon fa-envelope"><span class="label">Email</span></a></li>
</ul>
</footer>
</section>
<div id="wrapper">
<div id="main">
<section id="one">
<div class="container">
<header class="major">
<h2>@user.Name</h2>
<p>@user.Bio</p>
</header>
<p>Slinging code on GitHub since @user.CreatedAt.ToString("MM/dd/yyyy")</p>
</div>
</section>
<section id="two">
<div class="container">
<header class="major">
<h2>Repositories</h2>
</header>
<div class="features">
@foreach(Repository repo in repos.Where(x => !x.Fork).OrderByDescending(x => x.StargazersCount))
{
<article>
<div class="inner">
<h4><a href="@repo.HtmlUrl">@repo.Name</a></h4>
<p>@repo.Description</p>
<ul class="feature-icons">
<li class="fa-star">@repo.StargazersCount stars</li>
<li class="fa-code-fork">@repo.ForksCount forks</li>
@if(repo.Homepage != null)
{
<li class="fa-bolt"><a href="@repo.Homepage">Homepage</a></li>
}
</ul>
</div>
</article>
}
</div>
</div>
</section>
</div>
<section id="footer">
<div class="container">
<ul class="copyright">
<li>© Untitled. All rights reserved.</li><li>Design: <a href="http://html5up.net">HTML5 UP</a></li>
</ul>
</div>
</section>
</div>
<script src="assets/js/jquery.min.js"></script>
<script src="assets/js/jquery.scrollzer.min.js"></script>
<script src="assets/js/jquery.scrolly.min.js"></script>
<script src="assets/js/skel.min.js"></script>
<script src="assets/js/util.js"></script>
<!--[if lte IE 8]><script src="assets/js/ie/respond.min.js"></script><![endif]-->
<script src="assets/js/main.js"></script>
</body>
</html>
And there you have it, your very own static GitHub about page: