I've long been a fan of mobile development workflows. I've also been interested in the convergence of .NET Core on Linux and containers as a way to enable rapid, self-contained .NET development environments. It turns out that updates to mobile tools, improved container hosting, and a little elbow grease can create a very nice mobile development setup that includes the ability to easily work with GitHub and git, edit files, and run builds and unit tests all from your phone or tablet (assuming your phone or tablet is running iOS - someone else will have to figure out how to do this on Android).
The Tools
First let's look at the tools that we're going to use to make this possible.
Codeanywhere
I've had my eye on the Codeanywhere service for a while, but it wasn't until recently with a refreshed app and updated containers that it really made sense for .NET development. I've happy to report it's been working very well for me now. This will provide the containers we're going to use for development, but more importantly, it's going to provide out-of-the-box SSH access and a fantastic app for managing our containers and interacting with the terminal.
While Codeanywhere does have free plans that might work for you, I'm going to suggest the "Freelancer" plan which provides more functionality and most importantly, provides increased container disk quotas (which can be an issue with .NET development). It runs about $84/year (or $10/month) which is well worth it in my opinion if you're serious about mobile development.
Working Copy
Working Copy is an iOS git client app and it continues to improve at a rapid pace. It's great on it's own, but really shines when considering that many ways it can integrate with other apps and services. More specifically, we're going to use a new feature that was recently introduced which lets you upload your repository to an SSH server.
Textastic
While the Codeanywhere app provides an excellent file editing experience, Textastic integrates directly with Working Copy and since we're going to use the mobile device as the "source of truth" for our repository we need to edit files locally. Thankfully, it's also an amazing coding editor with syntax highlighting, a code-oriented keyboard, and more and only runs $10 to boot.
Pricing
While not expensive, this isn't going to be a totally free setup either. Each of these tools are robust and well developed and rightly charge for their use. If you ask me, the cost of each is a bargain considering what they do.
- Codeanywhere: $84/year for the "Freelancer" plan
- Working Copy: $16 for the pro unlock which enables SSH features (among many others)
- Textastic: $10
The Setup
Create Your Container
The first step is to create your container on Codeanywhere. To do so, create an account, open your dashboard, and create a new project (you might be prompted to create your first project automatically when you create your account as well). When you open your new project you'll be prompted to add a new container:
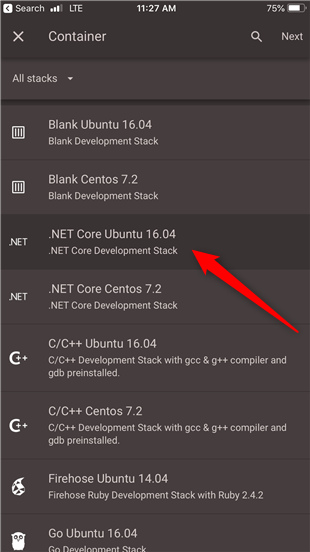
Select the Ubuntu .NET Core image (or Centos if that's your thing) and then select "Create". That's all you need to do and your new container will spin up in the background.
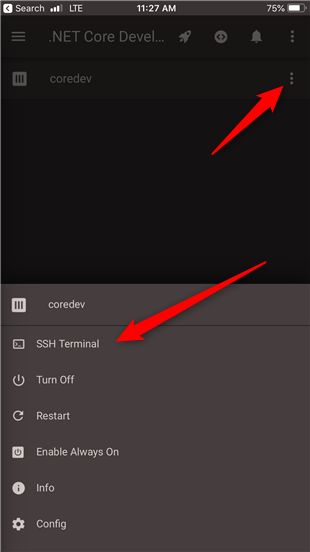
Once it's online you can connect to it within the app using SSH:
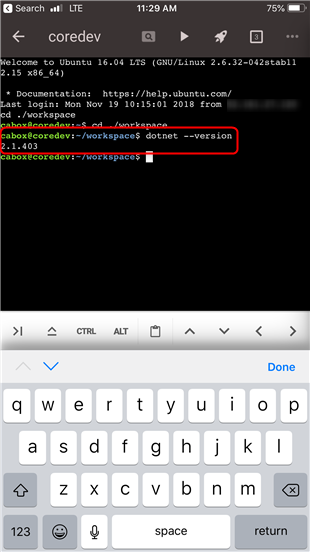
...and check the .NET Core version:
Clone Into Working Copy
The next step is to clone the repository we want to work on into Working Copy. You can use Working Copy's hosting provider integration or just clone straight from the repository URL:
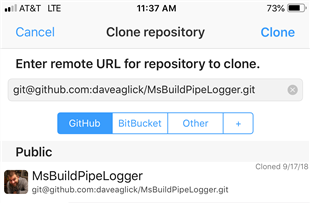
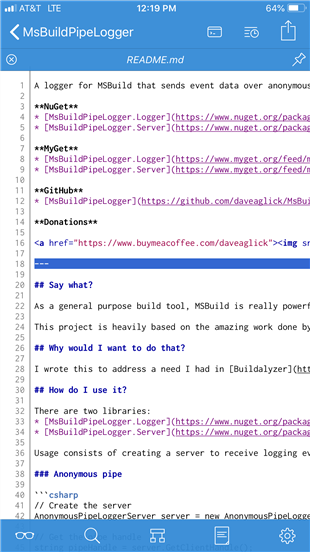
I'll use my project MsBuildPipeLogger as an example for the rest of this post.
Get SSH Information From Container
Now we're going to configure Working Copy to upload and synchronize changes to our container.
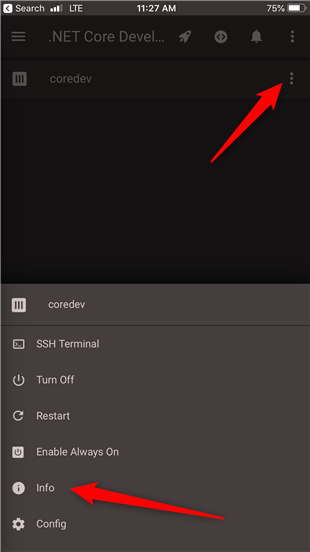
The first step is to figure out our SSH host. Click on the container actions button and then select "Info":
From the info screen, look for the hostname and port and note it down:

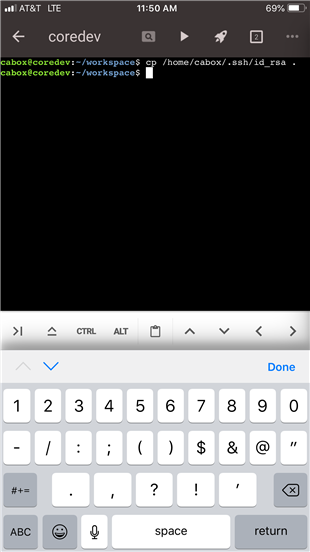
Next we're going to get the private SSH key from our container. This is stored at /home/cabox/.ssh/id_rsa (note also that the default user is cabox). The easiest way to get it's contents is to copy it to your root with the command cp /home/cabox/.ssh/id_rsa. Open a terminal and type that in:
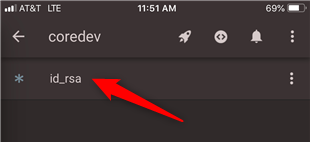
Then open that file directly from the Codeanywhere container file browser and copy it's contents to the clipboard:
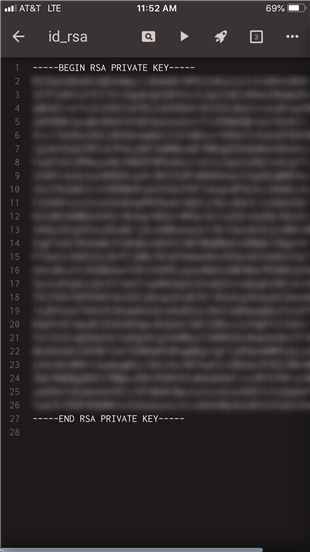
Note that the Codeanywhere file editor can be a little finicky and you might have to try to get the whole file contents within the text selector a couple times before you get everything. The goal is to get your private key onto the iOS clipboard where Working Copy can get to it.
Configure Working Copy for SSH Upload
Now we're going to move over to Working Copy and add our SSH key. Open the settings from the upper-right gear icon and then select "SSH Keys":

Then add the SSH key we copied from Codeanywhere by clicking the + icon in the upper-right and selecting "Import from Clipboard":
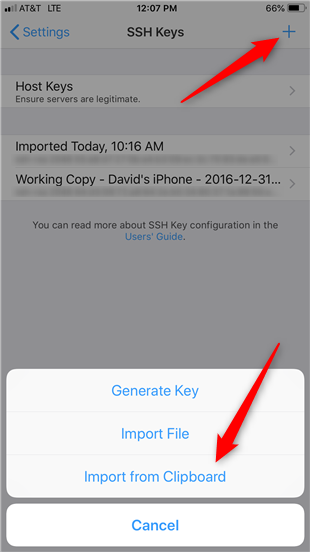
Once you're done you should see the new key in the list of keys.
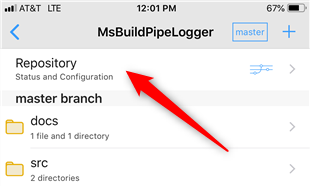
Now we'll add SSH Upload support to the repository we cloned. This will make Working Copy synchronize all changes within the app to the remote container. To add SSH support, open the repository and then click on the repository "Status and Configuration":
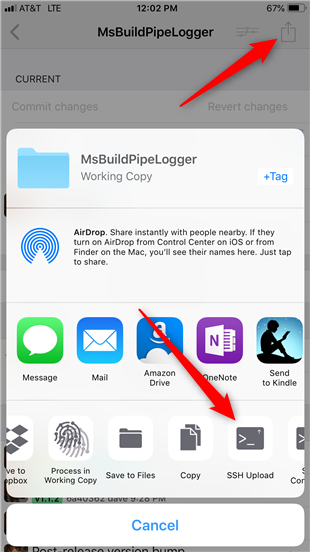
Then click the iOS action button in the upper-right corner and select "SSH Upload" from the list of actions:
Once you add the SSH host and port, Working Copy will ask if you want to accept the server key and then ask you to authenticate. Use cabox as the username and leave the password blank to use the SSH key you just added to Working Copy.
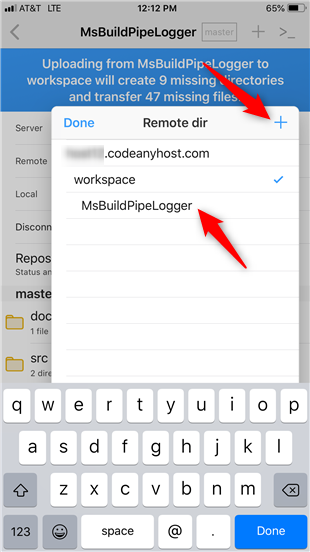
Once that's done, we'll select the remote folder we want to synchronize to. Select the folder icon next to "Remote" to open the folder selection:
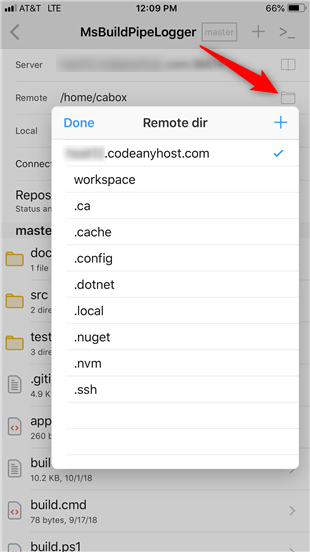
Then select "workspace" and add a new subfolder for our files:
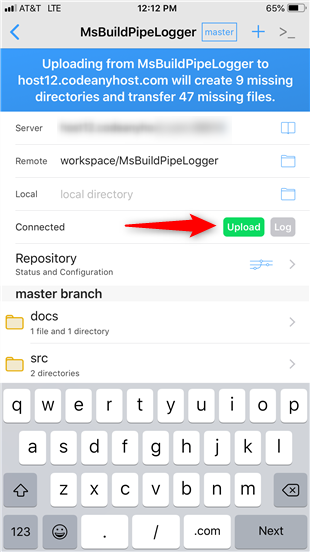
When you're all ready, select the "Upload" button to initiate the synchronization:
Edit Files
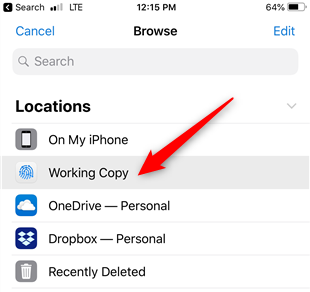
Now let's switch gears a little bit and edit one of our files like the readme. Open the Textastic app, select "Open..." and then select Working Copy as the location to open files from:
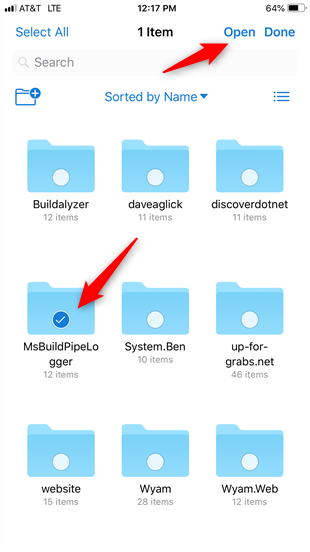
That will show folders for each of the repositories in Working Copy. Select "Select" from the top menu, highlight the repository folder you want to open, and then select "Open" from the top menu:
That will add the folder to Textastic and allow you to open and edit files in it:
Synchronize Changes
After you've edited some files, switch back to Working Copy. You'll probaby get a message about no longer being able to upload in the background. That's okay, just open the SSH settings from the terminal icon in the upper-right corner (if they're not already open), and select "Upload" to initiate the synchronization.
Now that the files are saved into Working Copy from Textastic, you can also initiate git commands such as committing your changes before or after you work with the files from your container.
Open Terminal To Run A Build
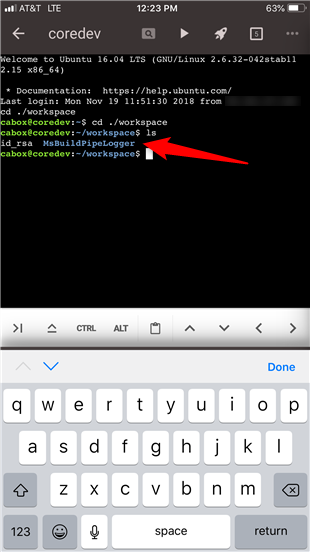
The last thing we'll do is switch back to Codeanywhere to open a terminal and run a build with our newly changed files. Open the SSH terminal for your container from within Codeanywhere and the folder you created from Working Copy should now be there:
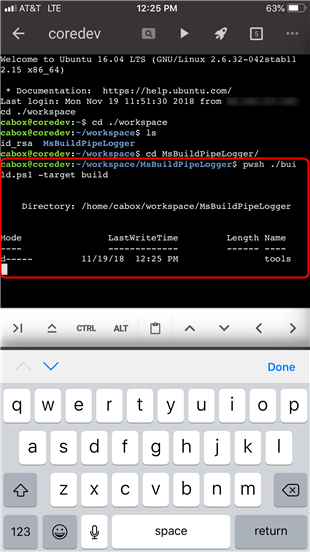
As with any bash prompt, you can open the folder and run a build:
Alternate Setups
What I've described is only one way you could use these tools. Some alternatives include:
- Do everything from the Codeanywhere app. It includes the ability to browse the file structure in your container and edit files with a nice coding keyboard directly from the app. The downside is you'll need to manage all your git commands yourself from the command line which can get cumbersome from a mobile device.
- Set up SSH Commands in Working Copy to let you run build or other commands directly from the app. This might be preferable to switching over to the Codeanywhere app for commonly run commands.